How to Read a Tape Measure: The Ultimate Guide for Beginners
Introduction
Ever wondered why your DIY projects don’t quite measure up? Perhaps you’re in the middle of apartment hunting, trying to size up if you can move your fridge to fit in the new space, or maybe you were attempting a home improvement project and found your measurements slightly off. Knowing how to read a tape measure is not just a handy skill, it’s a necessity that transforms your living space from a series of estimation mishaps into a perfectly curated abode.
Today, we’re going to tackle tape measures head-on, helping you master the art of measurement and navigate safety precautions. So get your tape measure and let’s dive in!
Metric Tape Measure: A Detailed Guide

In the world of measurements, having a certain familiarity with the metric system is key. Unlike its imperial counterpart, the metric tape measure operates on a base 10 system, which for many, can be a tad easier to digest.
With its precise division into centimeters (cm) and millimeters (mm), the metric tape measure is your go-to tool for tasks requiring a level of accuracy that estimates just can’t provide.
Understanding Metric Measurements
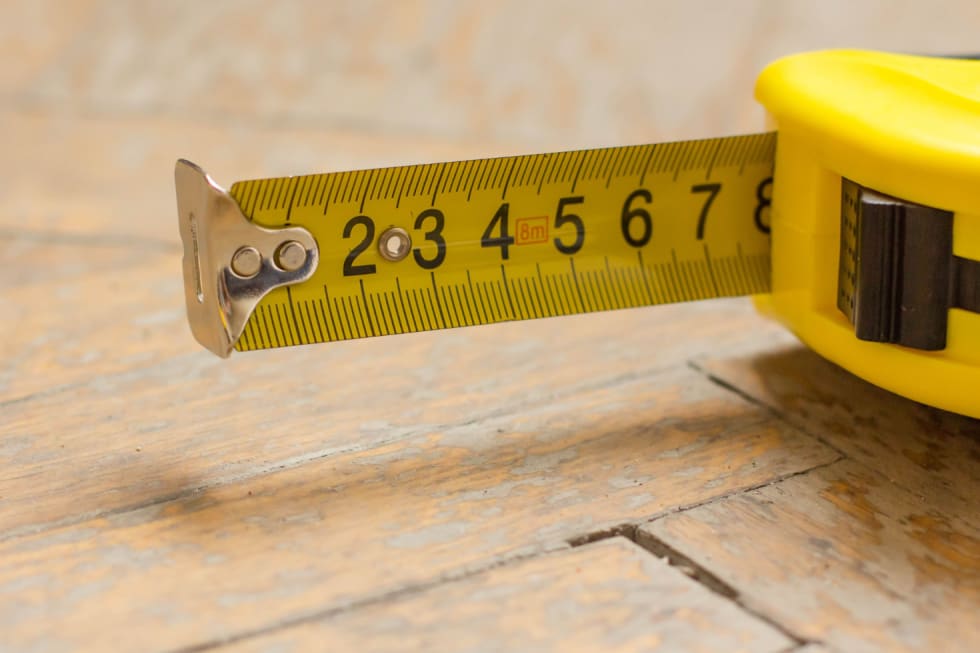
At the heart of the metric tape measure are the centimeters, numbered for convenience, with each centimeter further divided into 10 millimeters. This division is crucial for those precise measurements, whether you’re ensuring a picture frame is perfectly centered or calculating if a new bookshelf will indeed fit in that snug corner. It’s worth noting that while millimeters aren’t typically numbered, they’re easily countable due to their uniform spacing.
Step-by-Step Guide to Reading Metric Markings
-
Identify the Centimeter: Begin by locating the bold, numbered lines on your tape measure. These represent centimeters. If your measurement extends beyond these bold lines, you’re venturing into millimeter territory.
-
Count the Millimeters: For a more precise measurement, count the smaller lines between the centimeter markings. Each of these lines represents one millimeter. So, if you’re measuring something and find yourself three small lines past the 4 cm mark, you’re looking at a measurement of 43 millimeters.
-
Mastering the Millimeter Precision: Unlike the imperial system, where fractions can get a bit complicated, the metric system’s use of millimeters can simplify your measurements. For instance, instead of fractions, you’re dealing with whole numbers (41mm, 42mm, etc.), making calculations and conversions a breeze.
-
Utilize the ‘M’ Marker: On some metric tape measures, you might encounter a ‘1m’ marker, indicating 1 meter or 100 centimeters. This can be a handy reference point for larger measurements, helping you quickly ascertain distances without counting each centimeter individually.
Understanding Inches and Feet: Imperial Tape Measure Explained
Let’s shift gears and dive into the imperial tape measure. This measuring staple might seem a bit daunting at first, especially when those fractions start to come into play, but fear not! We’re here to break it down for you, inch by inch (pun intended).
The Layout of an Imperial Tape Measure
The imperial tape measure is your go-to when dealing in inches and feet, the bread and butter of measurements in many DIY projects and home renovations. Every long, bold line you see? That’s an inch mark. And those numbers written in bold? They indicate each inch along the tape’s length.
Now, for the bigger picture, when you zoom out, you’ll notice foot markings, typically represented with a different color or a standout symbol. These help you quickly jump from one foot to the next without having to count every single inch (because who has time for that when there are shelves to be hung and paintings to be aligned?).
Fractional Inches: The Key to Precision
Ah, the world of fractional inches, where the difference between 1/4” and 1/8” could mean the line between a snug fit and a return trip to the store. Here’s the thing: those smaller lines between the inch marks? They represent fractions of an inch. The longest lines denote half inches, the next size down marks the quarters (1/4” and 3/4”), and so on until we get to the teeny tiny lines that indicate 1/16th of an inch.
FAQs to Master Fractional Inches
-
Q: How do I easily identify fractional inches on a tape measure? A: Look for the longest lines which represent half inches, followed by slightly shorter lines for quarters, and so on. The smallest lines denote 1/16th of an inch.
-
Q: Can I measure in inches for projects requiring metric units? A: While it’s possible to convert measurements, for precision, it’s recommended to use a tape measure with metric units for those specific projects.
-
Q: What’s the trick to quickly measuring in feet and inches? A: Use the foot markings to jump quickly between feet, and remember each foot contains 12 inches for rapid calculations.
In essence, the imperial tape measure might seem like it’s speaking an ancient language at first glance, but with a little patience and practice, you’ll be fluent in no time.
General Tips for Effective Measuring
Ever noticed how the little hook at the end of your tape measure wiggles? That’s not a defect. It’s actually a feature designed to help you measure with precision.
The slight movement of the tape measure’s hook, or ‘tang’, plays a pivotal role in ensuring accurate measurements. When measuring interior dimensions (like the width of a window frame), push the hook against the object. This compensates for the hook’s thickness, ensuring your measurement starts exactly at the end of the tape.
For external measurements (think the length of a table), hook the tang over the object’s edge and pull gently. This accounts for the hook’s play, guaranteeing an accurate start point. It’s a clever mechanism that ensures your tape measure can accurately gauge both inside and outside dimensions without missing a beat.
Navigating the Case Length
One common mistake is forgetting to account for the tape measure’s case length when taking internal measurements. If you’re measuring a space where the tang can’t hook onto an edge (like the distance between two walls), the case length becomes part of your measurement. To avoid miscalculations, look for the case length noted on the tape measure itself—most have this information. By adding this number to your measurement, you maintain accuracy without the need for mental gymnastics.
Avoiding Common Measuring Mistakes
To enhance your measuring accuracy further, here are a few common mistakes to watch out for:
- Not Checking the Hook’s Condition: Before measuring, ensure the hook is not bent or damaged, as this can throw off your measurements.
- Ignoring the Tape’s Flex: For longer measurements, be aware that the tape can flex or sag. Keep it as straight and level as possible.
- Relying Too Much on the Lock: While the tape lock is useful, relying on it too heavily can cause the tape to stretch slightly, affecting accuracy.
Remember, precision in measurement is not just about the numbers you read off the tape, it’s about understanding how every part of your tape measure interacts with the spaces and objects you’re measuring.
Safety Tips for Using a Tape Measure

Did you know that one of the most common DIY injuries comes from something as simple as a tape measure? That’s right! When that metal blade whips back into its housing at lightning speed, it can cause cuts, bruises, or worse.
So, how do we avoid turning a quick measurement into a trip to the emergency room?
Controlled Retraction is Key
First and foremost, always control the retraction of your tape measure. Instead of letting it snap back at full force, guide it gently with your hand. This not only prevents injuries but also protects the tape measure from damage, ensuring it lasts longer and stays accurate.
Safety Glasses: Not Just for Looks
While it might seem over the top to don a pair of safety glasses just to measure the future home of your new bookshelf, eye protection is a smart move. The tang (the metal hook at the end of the tape) can fling back unexpectedly, and those sharp edges aren’t something you want coming anywhere near your eyes.
Watch Out for Those Edges
Lastly, be mindful of the tape measure’s blade edges. Some are designed with serrations to help grip surfaces, but these can be sharp. Handling the tape with care, especially when retracting it, can prevent nasty cuts.
Enhancing Your Tape Measure Skills
Mastering the art of reading a tape measure is a skill honed through practice, patience, and a bit of guidance. Remember: every expert was once a beginner.
Here’s how you can elevate your tape measure game from novice to pro.
Visual Aids: Your Best Friend in Learning
Visual aids can significantly accelerate your learning curve. Consider using infographics or step-by-step videos that break down the process into manageable chunks.
These resources can transform seemingly complex measurements into straightforward, understandable concepts. Many DIY enthusiasts have shared their “aha” moments when a visual guide clicked for them, turning confusion into clarity.
Testimonials: Learning from the Masters
There’s nothing quite like hearing success stories from those who’ve mastered the skill you’re striving to learn. Browse forums, watch video testimonials, or read blog posts from seasoned DIYers and professionals. These stories not only motivate but also provide insider tips and tricks that you might not find in a manual.
Practice Makes Perfect
Finally, the most timeless advice remains true: practice makes perfect. Carry a tape measure with you as often as you can. Use it in everyday situations, be it measuring furniture for a new condo, planning a garden layout, or even calculating the height of your favorite potted plant. Each measurement taken is a step closer to fluency in this essential skill.
Conclusion
And there you have it, folks – your very own comprehensive guide to becoming a tape measure wizard! From deciphering the mysteries of metric and imperial measurements to navigating the subtleties of tape measure hooks and case lengths, we’ve covered all the bases to ensure your measuring tasks are as seamless as possible.
Ready to put your new skills to the test? Whether you’re measuring for furniture or checking if your dream apartment fits your needs, our AI-powered apartment-finding platform is here to help. With just a few clicks, personalize your search to find spaces that match your exact preferences—from square footage to layout and amenities.Start Searching
FAQs
FAQs
Q: How do I ensure my tape measure is accurate?
A: First, check if the hook at the end of the tape measure moves slightly - this is intentional to account for its thickness during inside and outside measurements. Also, verify the tape measure against a known length or another tape measure for consistency.
Q: Can I use a metric tape measure for all my projects?
A: Absolutely! Metric tape measures are great for precision and are widely used globally. However, depending on your project’s requirements or if you’re following a specific set of plans, you might also need to be comfortable using an imperial tape measure.
Q: What’s the best way to measure corners and tight spaces?
A: For tight spaces, you can use the case of the tape measure as a pivot point. Extend the tape into the corner, and then add the length of the tape measure’s case to your measurement for an accurate read.
Q: How can I quickly find the center of a space with a tape measure?
A: Measure the total length of the area, then divide by two. Most tape measures have a black diamond or red markings at 16-inch intervals to help with stud spacing, which can also guide you in finding mid-points for common dimensions.
Q: Why does my tape measure have a serrated edge on the hook?
A: The serrated edge or teeth on the hook are designed to grip onto surfaces, preventing slippage while you measure. It’s especially handy when you’re measuring on your own and need the tape to stay put.
Q: How do I take care of my tape measure to ensure longevity?
A: Avoid letting the tape snap back into the case, as this can damage both the tape and the spring mechanism. Keep it clean and dry, and occasionally apply a light lubricant to the tape if it begins to stick.
Got more questions or a specific measuring challenge?
While Sunny.com doesn’t currently have a direct submission feature for questions, we’re always keen to hear from our readers through our social media channels. Share your queries, and we might feature them (with answers) in future updates to this FAQ section!